
System Requirements
Hardware requirements:
- 2-core CPU or higher
- 16 GB RAM
- 2 GB free Hard Drive space
- OS Windows Server 2016 or higher x 64bit
Software prerequisites:
- Private Agent enabled in your Dotcom-Monitor account
- .NET Framework 4.7.2 or higher
- Windows Media Player (for Streaming Media tasks only)
- Remote Desktop service enabled on the machine (for browser-based UserView/BrowserView tasks only)
- Administrative Access for installation and execution
- Chrome or Edge for Private Agent registration only
Outbound Traffic Requirements
For Private Agent operation, allow access to Dotcom-Monitor resources from the computer with an installed agent. Depending on your firewall requirements, whitelist either of the below:
| IP Range (Recommended) | Host | URL |
| 8.29.56.0/23 |
|
|
Preparing Your Server for the Private Agent Installation
We highly recommend using a dedicated Windows Server for your private agent installation. Depending on the number of monitoring devices you are going to simulate on your private agent, the load can be high and can have an impact on CPU or Memory utilization of this server.
Follow all preparation steps below once you’ve selected your private agent server:
| Step | Details |
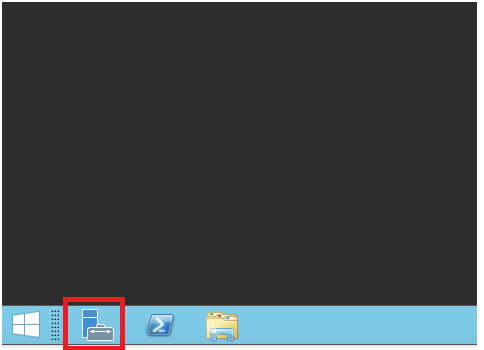
| 1. Open Server Manager | Click the Server Manager icon on the desktop.
|
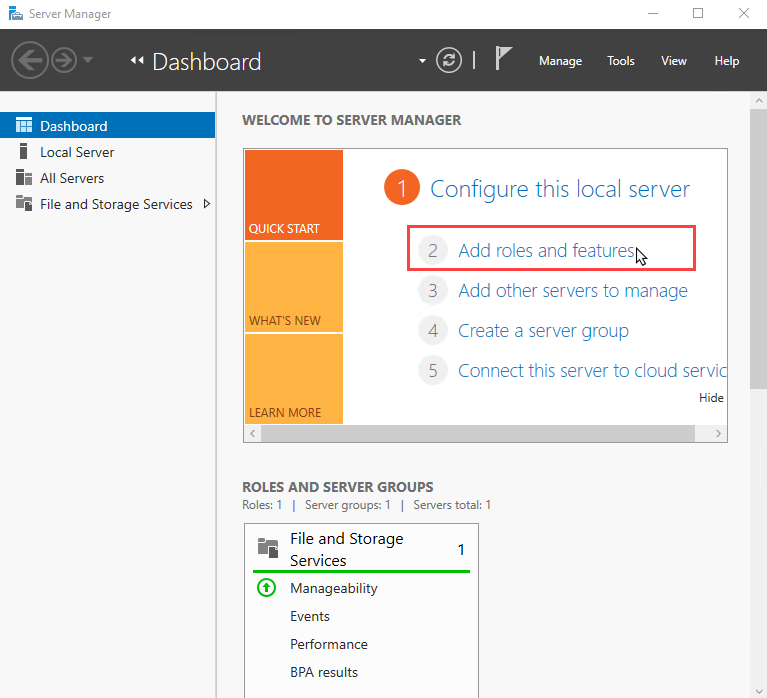
| 2. | Click Add roles and features on the Server Manager Dashboard.
|
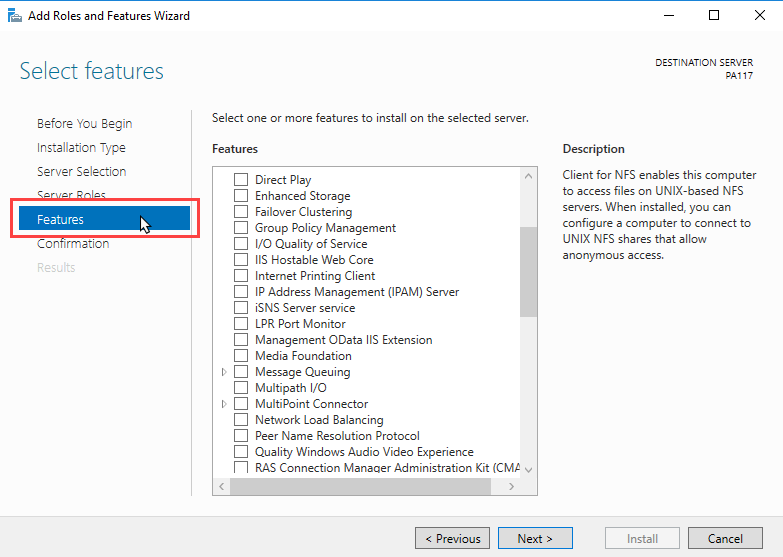
| 3. | In the Add Roles and Features Wizard, navigate through tabs to the Features tab.
|
| 4. Streaming Media monitoring and video recording on monitoring sessions | To enable video recording on monitoring sessions and to monitor media streaming, select and expand User Interface and Infrastructure, and then select all enclosed check boxes below. Select Media Foundation. |
| 5. | Select .Net Framework 4.7.2 Features Installed and all enclosed items. |
| 6. | Click Install. |
| 7. | Restart your Windows Server. |
Installing Private Agent on Your Server
Once all preparation steps are done, you can install the private agent software on your server. This section covers all installation steps. Follow those instructions step by step.
| Step | Details |
| 1. Account with Admin Permission | You need an account with Admin permission for this Private Agent installation. Ask your domain admin to get administrative rights on your Windows Server. |
| 2. Configure Private Agent | 2.1 Login to your DCM Account.
2.2 Go to Manage > Private Agents. 2.3 Click New Agent and select the version to add to your account:
2.4 Specify a descriptive name that is recognizable in a list of other Private Agents. Optionally, fill in the Description field. 2.5 Adjust Private Agent options (if it is necessary) and click the Add button. A new Private Agent will be displayed in the list of Private Agents. |
| 3. Setup Private Agent | 3.1 Login to your Windows Server (with Admin Account).
3.2 Start a browser on your Windows Server. 3.3 Login to your DCM Account. 3.4 Go to Manage > Private Agents. 3.5 Click Download Installer and download the agent version that matches the version selected in Step 2 of this guide. If the Download Installer button is disabled, please contact Dotcom-Monitor support team. 3.6 Once downloaded, Run the PrivateAgentSetup installer. 3.7 Follow the steps of the Setup Wizard by clicking Next. Accept the terms in the license agreement and confirm or change the destination folder. 3.8 To finish the installation process, click Install. 3.9 In the appeared Private Agent Registrator dialog, wait for the required services check, and click Login to login to your Dotcom-Monitor account and register the agent. 3.10 Provide your DCM User ID and Password and 3.11 Choose the private agent you have created from within your Dotcom-Monitor account and click Install Agent. Registration of Private Agent may take a few minutes. 3.18 If successful, Close the setup dialog and proceed to the next step of this guide. |
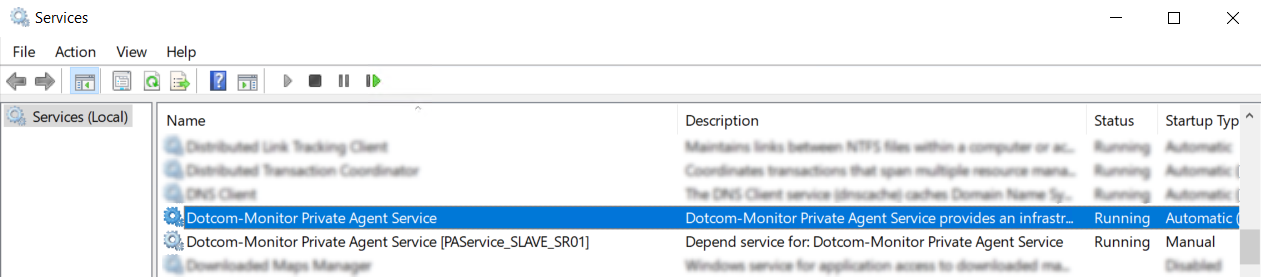
| 4. Check Services on your Windows Server | Open Service Overview on your Windows Server and check if Dotcom-Monitor Private Agent Services are up and running:
Private Agent application uses two Windows services that work together to run monitoring and automation tasks:
|
| 4.1 Optional: Customizing PAService_SLAVE_SR01
|
If your setup requires the use of a specific Windows account (for example, your organization’s RDP user), you can configure it in the dependent PAService_SLAVE_SR01 service:
When configured correctly, Dotcom-Monitor will automatically detect and use this account instead of the default DotcomMonitorRdp user to run supporting processes under the specified Windows user. |
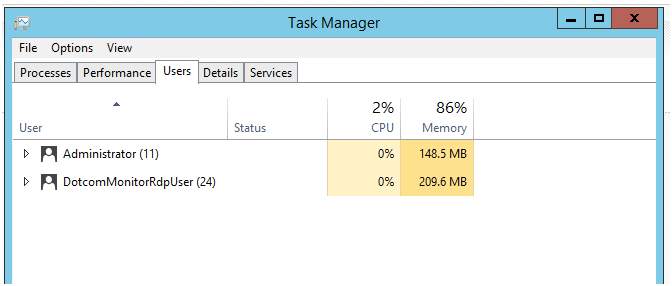
| 5. Check User on your Windows Server | 5.1 Open Task Manager.
5.2 Click Users. 5.3 Check if there is a user called DotcomMonitorRdpUser.
|
| 6. | 6.1 Restart your Windows Server.
In some cases, the Private Agent can’t be used without a restart. It’s recommended that you restart your Windows Server after the installation has been completed. |
Using Private Agent
Once a Private Agent is installed and configured, Dotcom-Monitor automatically adds the agent to the list of available monitoring locations under the Private agents region. To use the Private agent location, activate it in the Monitoring Agents list it in the monitoring device settings.
To use the Private Agent in your network in an efficient way, follow the steps provided below:
- Login to your Dotcom-Monitor account.
- On the left sidebar, select Devices.
- On the Device Manager page, create a new device or open an existing one to edit (select Edit from the device menu
 ).
). - From within the device editor, go to the Locations tab and navigate to the Private agents section.
- Activate required Private Agent location(s).
- Save changes. The private agent location(s) activated under the Private agents region will be used to run monitoring.
Additional Requirements
When monitoring a website or web application using the Edge browser (UserView/BrowserView monitoring), make sure you have the latest available version of the Private Agent software. See also: Updating Private Agent.
For web application monitoring and some specific custom scripts, Private Agent requires either:
- Access to RDP for the local user generated during the installation of DotcomMonitorRDPUser or for any other local user supplied by the client.
- If a group or local policy of the Private Agent server prohibits the use of a local user, the client is required to supply a domain user. This domain user should have the necessary access rights to create an RDP session on the PA server and should also be granted the rights to launch our service.
- If RDP is present yet the Private Agent is still not working, make sure that the “Always prompt for password upon connection” security policy setting is not enabled on your machine (Local Computer Policy > Computer Configuration > Administrative Templates > Windows Components > Remote Desktop Services > Remote Desktop Session Host > Security). Otherwise, disable this policy setting for the machine.