
An HTTP Webhook integration is a common method of connecting online accounts to receive automatic messages when a triggering event happens. Dotcom-Monitor allows you to push a payload with alert notifications from your Dotcom-Monitor account to another application using a unique Webhook URL. Every time Dotcom-Monitor generates a monitoring alert, the alerting system will push an alert notification to the provided webhook URL automatically.
You can customize your request parameters to define the specific content of the alert messages. You can send either a static text message, push a dynamic payload based on Razor syntax, or use predefined Alert Templates. Moreover, you can use Razor syntax and predefined templates to send additional information along with HTTP headers and customize authentication credentials.
Configuring HTTP Webhook Notification Address
Let’s break down the setup process of the HTTP Webhook address.
First, create a new webhook in your application. Next, in the alert group settings of your Dotcom-Monitor account, select the HTTP Webhook address type. In the address settings, provide the Webhook URL and select the HTTP method that the system will use to push a payload with an alert notification message to the webhook URL.
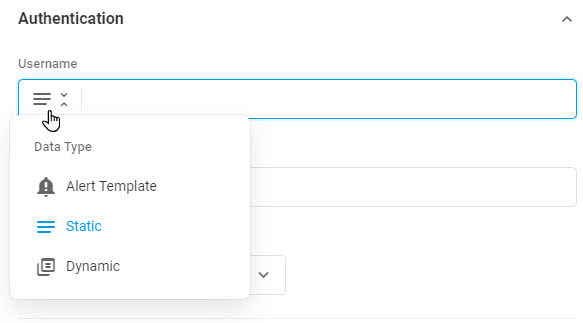
Authentication
If your recipient server requires authentication of all incoming requests, you can provide login credentials in the Authentication section. The credentials will be passed along with the requests to the Webhook URL.
The following types of webhook authentication are available:
- Auto – the authentication type will be selected automatically, depending on the recipient server response.
- NTLM – allows authenticating requests to networks that use the NTLM authentication protocol.
- Digest – allows authenticating requests to web servers that require Digest authentication.
- Basic – allows to send login and password fields along with the header of the HTTP request.
Note that you can pass dynamic credentials as well as a static login-password pair. To customize your authentication credentials, click the drop-down menu icon at the beginning of the corresponding input field and select the type of content you want to add. For more details on configuring custom authentication parameters, please see the How to Set HTTP Webhook Request Parameters section of this article.
Headers
To send custom headers along with the request, expand the Headers section, click Add and provide a new header parameter.
If you need to pass custom information in your header, for example, alert server time, click the drop-down menu icon at the beginning of the parameter value field and select the type of content you want to add.
Post Data
To create a notification message, select the Data Type of the request body content:
- None – select to send requests without a payload in the body.
- Form Data – select to send a notification message as a static name-value collection.
- Form URL Encoded- select to send URL encoded message within an HTTP requests body.
- Raw – select to send a message within the HTTP request body as “raw” data (JSON, XML, HTML, TXT.) Continue with the Content Type.
To customize the content of the message, click the drop-down menu icon at the beginning of the request body input field, select the type of data you want to send in the body, and add the message content that will be pushed to the target web application.
How to Customize HTTP Webhook Request Parameters
Dotcom-Monitor provides users with a variety of options to support notification request customization. Depending on your goals and your web application server requirements, you are flexible to personalize your notification message and other request parameters by using one of the offered data types.
Alert Template
The alert template can store not only the alert message content but any type of content that you want to use in the parameters of several Webhook addresses. If you need to create a new reusable template, please create one as described in the Alert Template: Setup and Configuration (Text & HTML & JSON) article of this wiki.
To select a pre-configured template, click the input field and select the template from the list.
Static Content
If you need to pass static data along with your request parameters, select the Static option. You can enter the content into the input field.
Dynamic Content
Alert messages and other request parameter values can be personalized by using dynamic variables. Dotcom-Monitor will pass the current system values to the associated variables upon sending an alert notification. Dotcom-Monitor dynamic templates are implemented with Microsoft’s Razor parsing engine and can be created from within the message input field. Please learn how to work with dynamic variables in the Adding Dynamic Variables to Alert Template Knowledge Base article.
If you want to leverage alert templates created before or use our predefined HTML snippets, expand the message input field and use the message editor as described in the Alert Template: Setup and Configuration (Text & HTML & JSON) article of our Knowledge Base.