
If you have been using JMeter for load testing, and want to set up an automated load test in LoadView, you do not need to transfer your request data from your JMeter Test Plan to LoadView manually. LoadView supports JMX files imported from JMeter. Request parameters such as a target URL or IP, path to an endpoint, request type, request headers, text assertions, etc., will all be converted automatically into LoadView JMeter Project upon import.
Please note that we DO NOT import the Thread Group settings into LoadView JMeter Project. Thread Properties (the number of threads, ramp-up period, etc.) can be configured by setting up a scenario of your load test execution in LoadView. Use the recommendations provided in this article to configure your load test execution scenario.
LoadView JMeter Project
To configure a JMeter project in LoadView:
- Within the Apache JMeter application, save your JMeter test plan (File > Save) to a JMX file on a local computer.
- Next, log in to your LoadView account and click New Test on the Test Scenarios manager page .
- Add New Target and on the Select a Load Testing Type page, pick the JMeter test type.
- Next, on the test edit screen, click Import and import the JMX file that you saved on the first step. The XML content of the file will be provided in the JMeter Project field. If necessary, you can edit the XML code in the field.
- Optional: In the Timeout field, you can set the test session execution timeout in seconds. LoadView waits for a response from the target resource for the specified time and if the execution time exceeds the limit, the system ends the session and returns an error. If this is left blank, the default timeout is 120 seconds.
- Click Create Device and continue with the load test execution scenario.
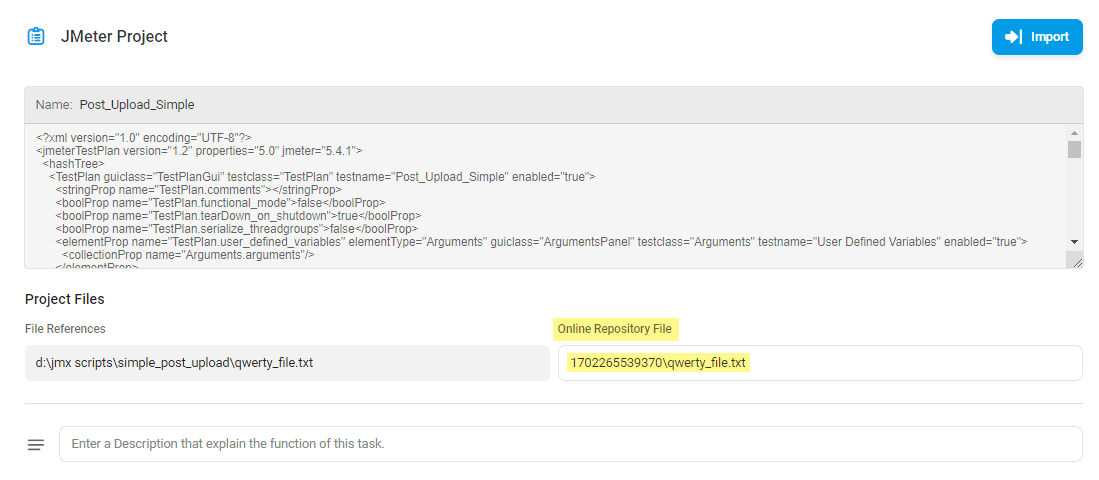
File Upload
If your JMeter test plan contains a reference to a file, once imported into LoadView, the file name will be shown in the Project Files section.
The system automatically generates an online repository path to store the file in the LoadView cloud. The path appears in the Online Repository File field. To use the file in the test, you need to upload the file to the provided repository.
To upload the file to the online repository, please make sure to save the test, and then create a support ticket with the following information:
- The name of the LoadView test.
- The Online Repository File path as appears in the test target settings.
- A copy of the file to upload. Please attach the file to your ticket.
Please allow some time for our team to process your request.
Configuring Load Curve in LoadView
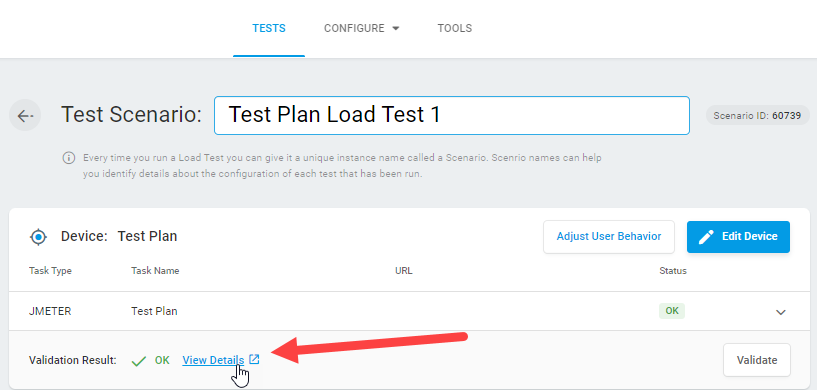
Once the JMeter Test Plan has been imported into LoadView, the LoadView test execution scenario must be set up on the Test Scenario page. If you have Thread Properties set up for your JMeter Thread Group, and want to stick with the same load pattern in LoadView, specify the corresponding Load Type parameters using the recommendations in the following sections. Otherwise, use the Choosing the Right Type of Load Curve article to pick and set up the right type of load curve.
Configuring Threads and Ramp-up Period in LoadView
The ramp-up time is a very important part of the load testing process, but often goes overlooked. If you are planning to test with a large number of concurrent users, you do not want to immediately ramp-up your test to the maximum number of concurrent users, as this does not reflect real-world conditions and it may have unintended consequences, like unintentionally crashing your site. If that happens, you will not know what your site can handle or how it responds before that point. By setting a ramp-up time, you can gain a more accurate representation of how your site or application handles concurrent traffic at different levels.
For more information about properly determining concurrent users for load tests, visit our Analytics to Concurrent Users Calculator & Formula Knowledge Base article.
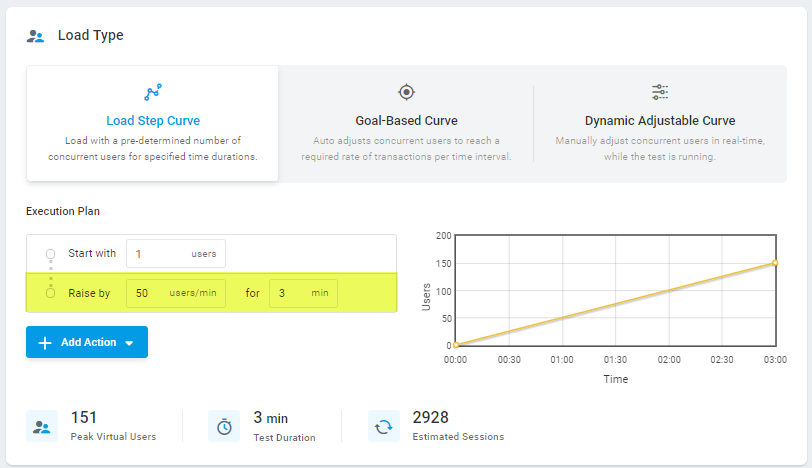
To specify a load pattern that corresponds to Number of Threads and Ramp-up Period that you have been using in your JMeter test plan, use the Raise By scenario step of the Load Step Curve in LoadView:
1. First, calculate the ramp-up period in minutes:
Ramp-up Period in minutes = Ramp-up Period / 60
Next, calculate the number of threads that need to be up per minute:
Number of Threads per minute = Number of Threads / Ramp-up Period in minutes
2. In the Execution Plan section, Start with 1 user and specify the Number of Threads per minute and Ramp-up Period in minutes values in the corresponding fields of the Raise By step.
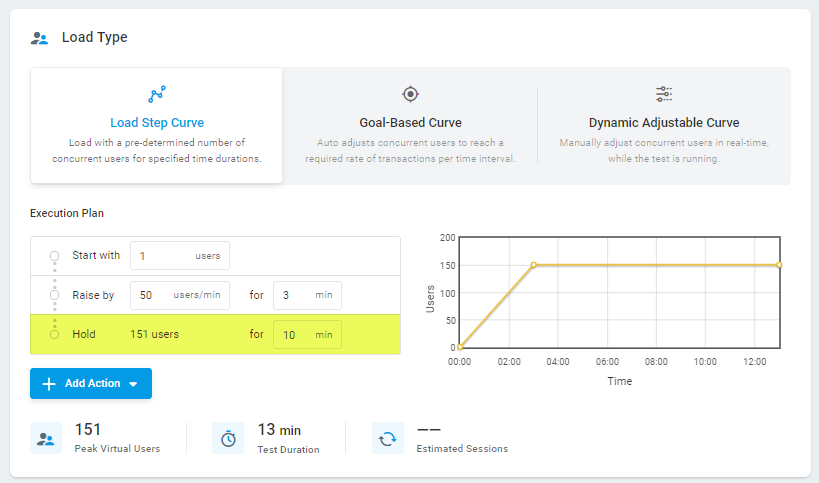
Setting Up Test Duration in LoadView
To set up the time during which you want the system to apply the load to your target website, use the Hold for step.
Setting Ramp-down Time in LoadView
Similarly, ramp-down time is another factor that needs to be considered during load testing. Ramp-down time would correlate to the traffic you would see at the end of your peak hours, where you would normally tend to see a drop in the number of concurrent users. For this, you would want to set a similar strategy for load testing best results. Learn more about setting up a Load Curve load test.
Other Recommendations
To configure other settings on the Test Scenario page, see the How to Setup LoadView for Load and Stress Testing article of our Knowledge Base.
If you need any further assistance with converting JMeter load tests into the LoadView platform, please contact our technical support team. Our team is available 24/7 to assist with all your load and performance testing needs.
Or if you already have a LoadView account, you can submit a ticket from directly within the LoadView platform. To submit a support ticket, simply log in to your account. From the top right-hand side, hover over Support, then select Tickets to submit a request.