File Upload Handler represents the OpenFileDialogHandler method and provides support for file upload on a target website. The option allows passing a file to an upload dialog box and initiating upload.
Note that the option is available only in conjunction with the file Download option or when a file download step was recorded earlier within the script.
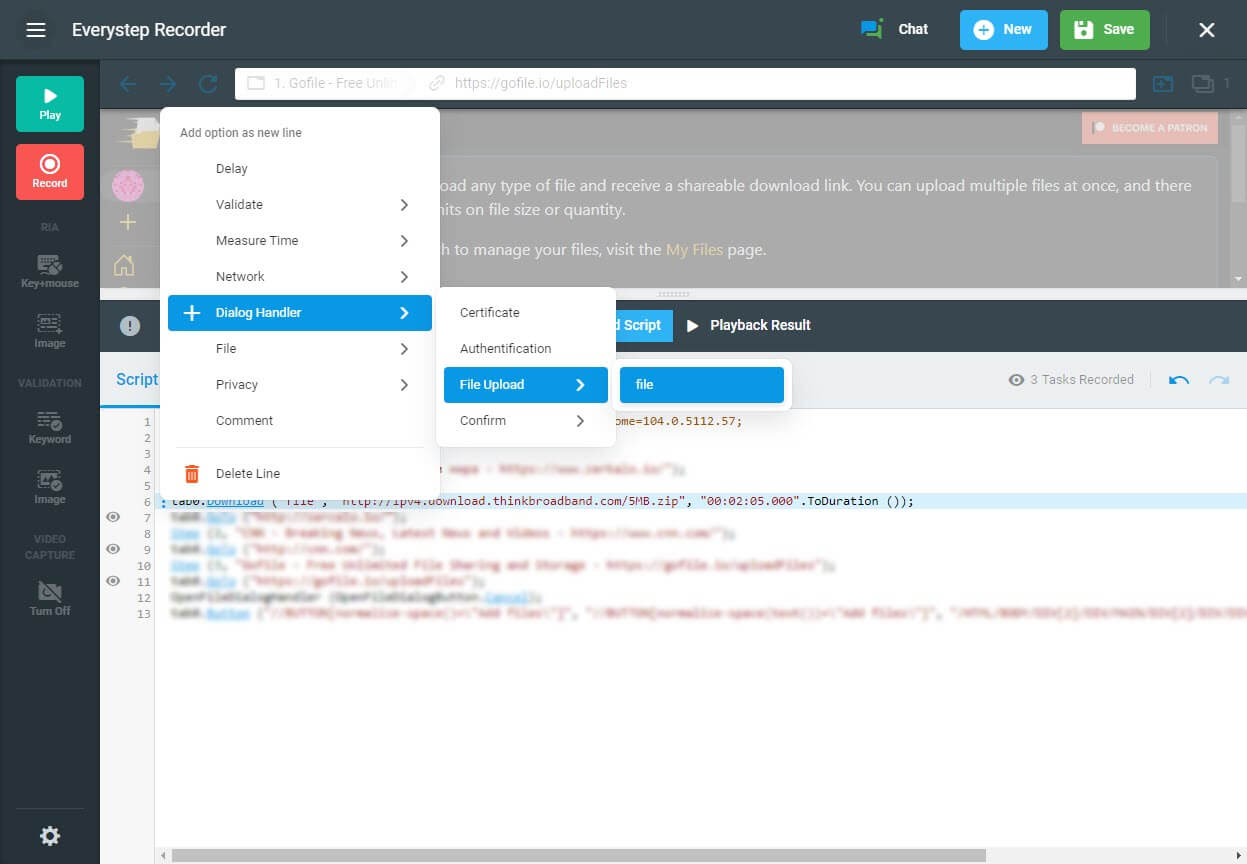
To apply the handler:
- Right-click the line (step), after which the handler should be enabled.
- Select Dialog Handler > File Upload.
- Select a file name from the list of the files downloaded earlier within the script. Note that you can edit the handler parameters on the editing pane, located to the left of the script code area.
Once the handler is applied, the OpenFileDialogHandler method waits for a button click event that calls the upload dialog box, passes the specified file name in, and executes the upload operation.
Usage Example
Let’s say we need to record a file upload test scenario but don’t have a test file to upload in hand. With the File Upload Handler, we can add a test file to upload to the script later once the recording is finished.
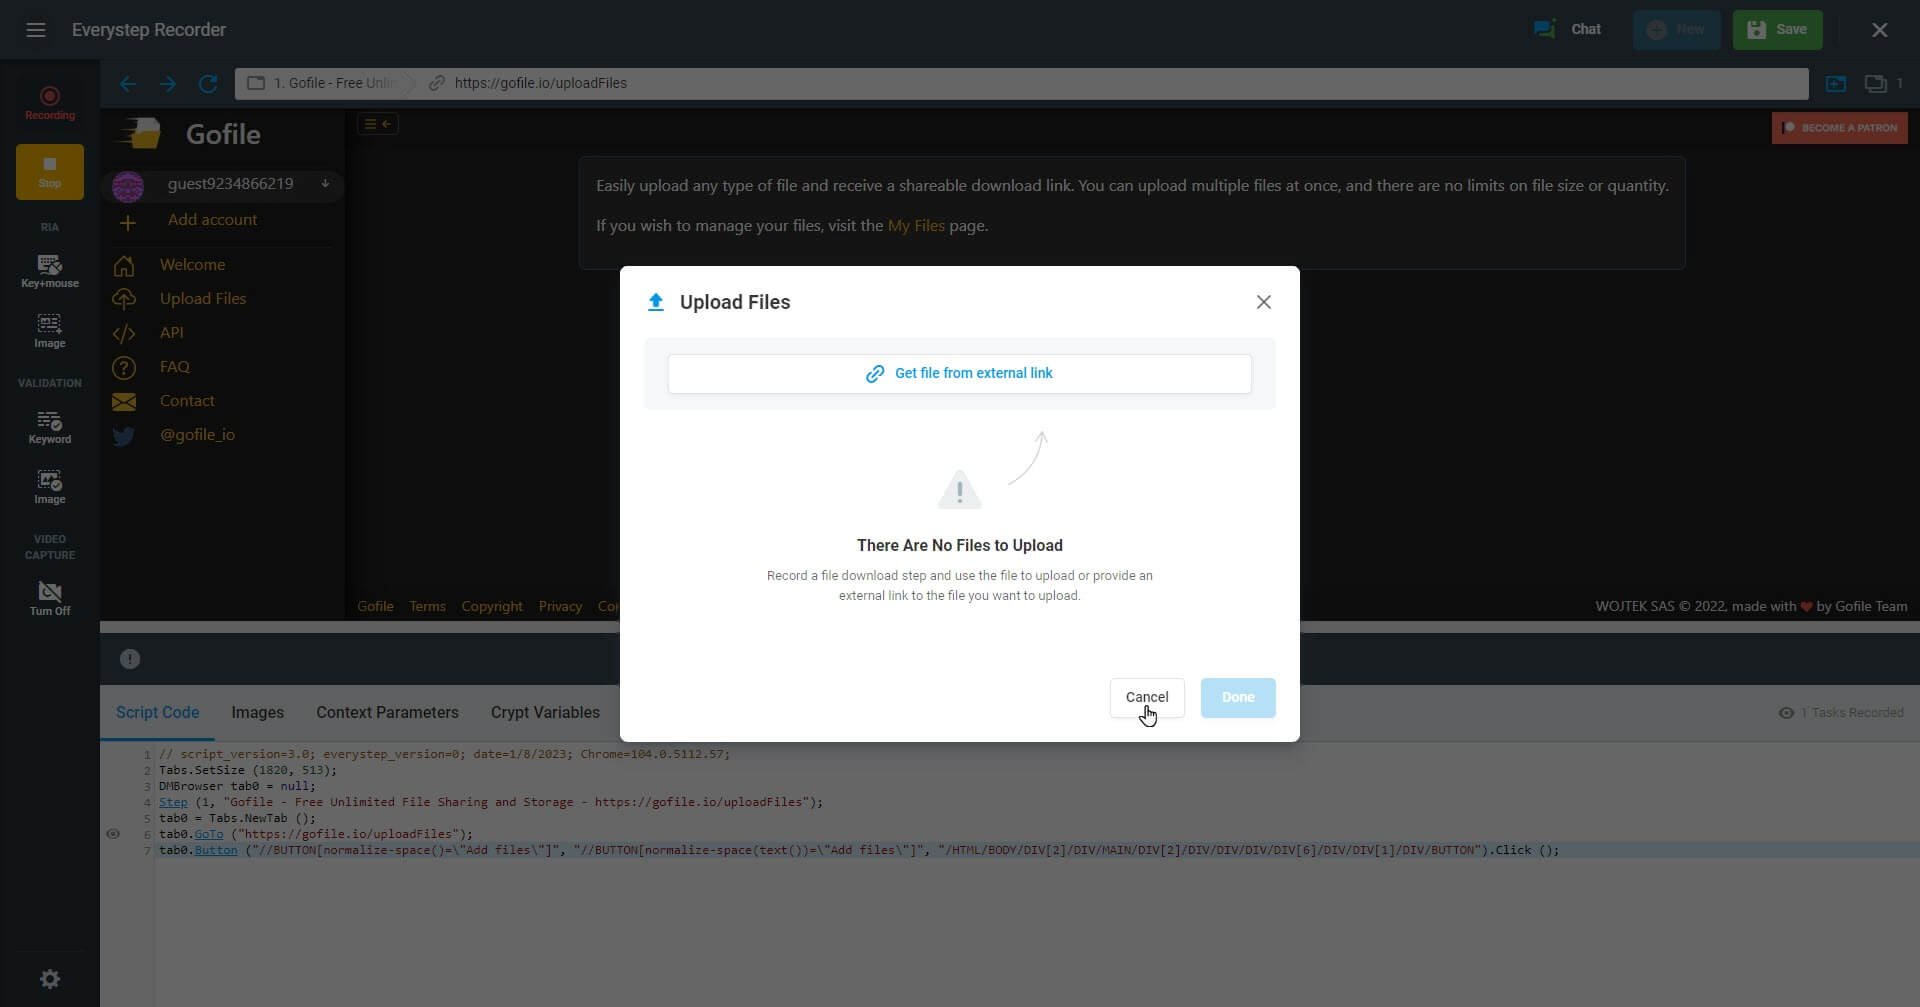
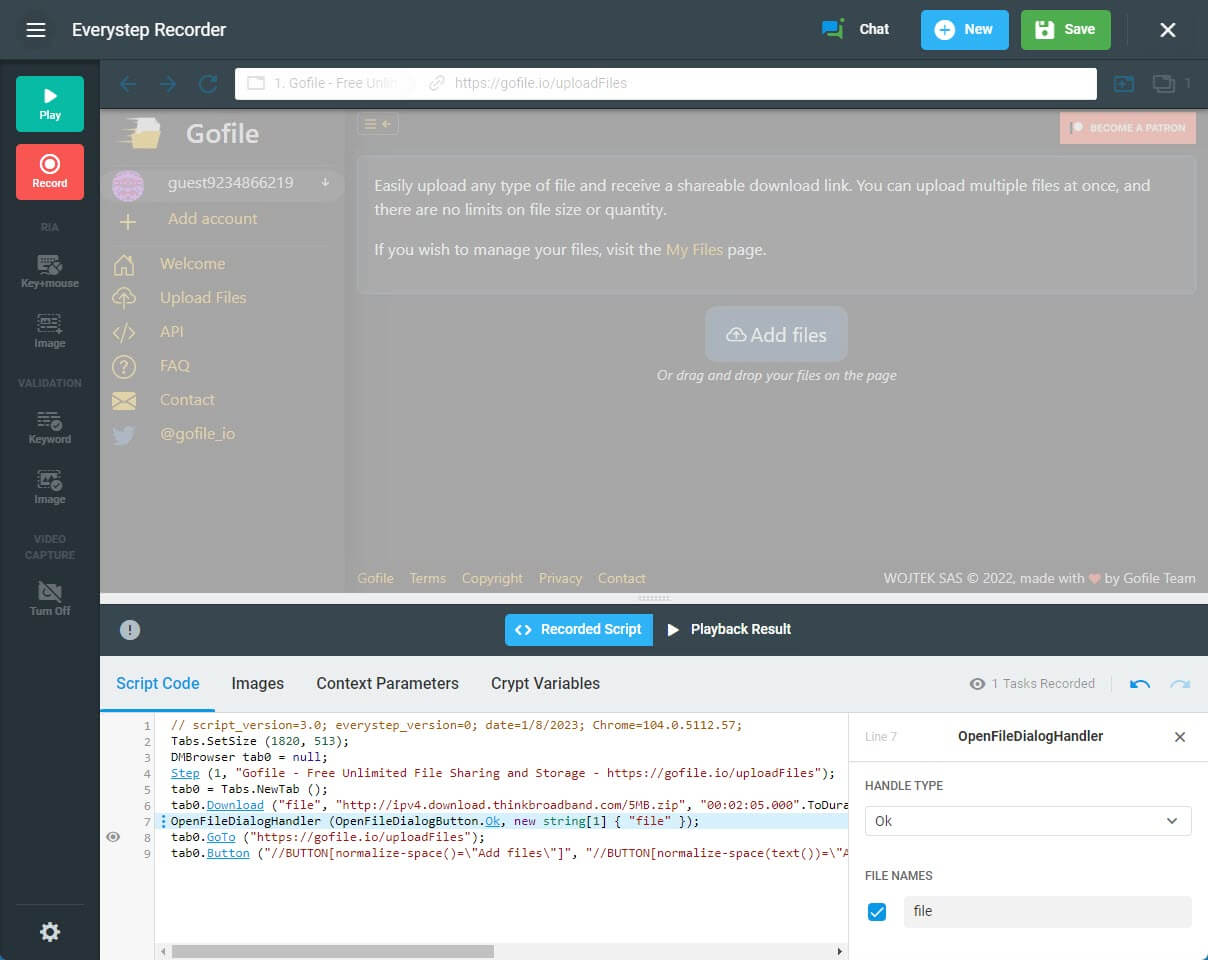
Let’s start with recording an upload transaction in the EveryStepWeb Recorder. To support the upload scenario, we click the Add files button on the file upload page. Since we want to add a file to upload later, we click Cancel in the Upload Files dialog.
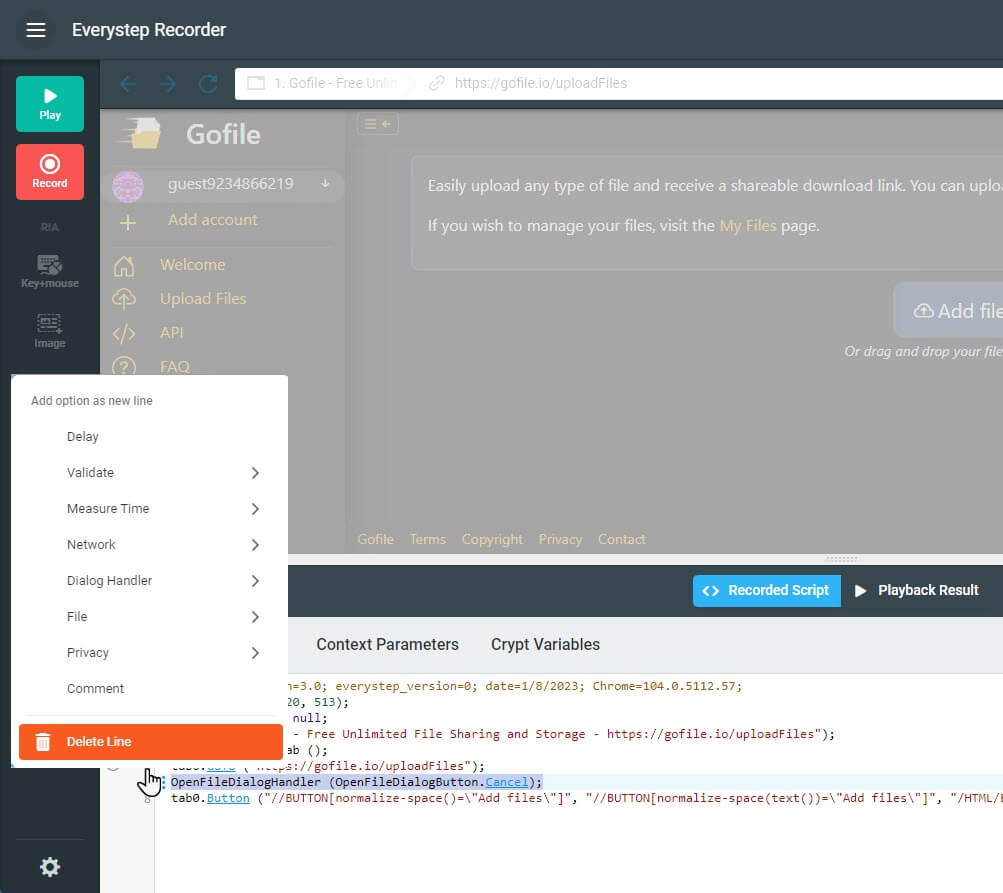
Next, we stop recording and delete the OpenFileDialogHandler (OpenFileDialogButton.Cancel) line from the script.
Then, we need to add the Download method to download a test file to the system.
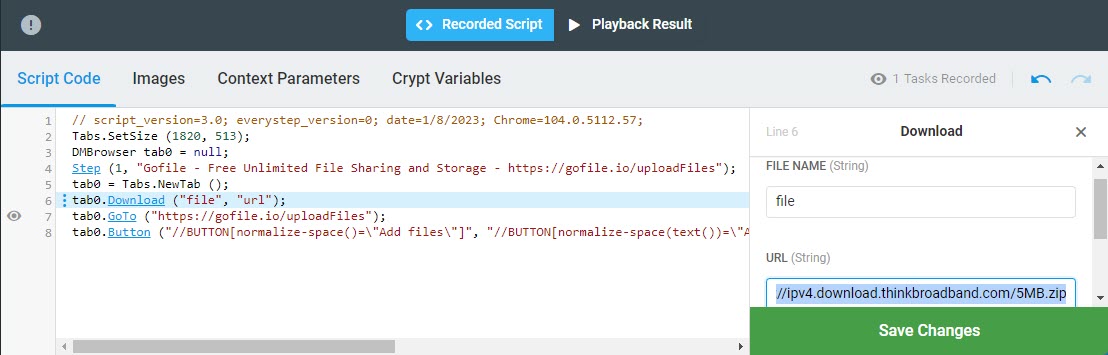
Finally, we use the File Upload handler to pass the test file to the file upload dialog box that will appear upon the script replay.
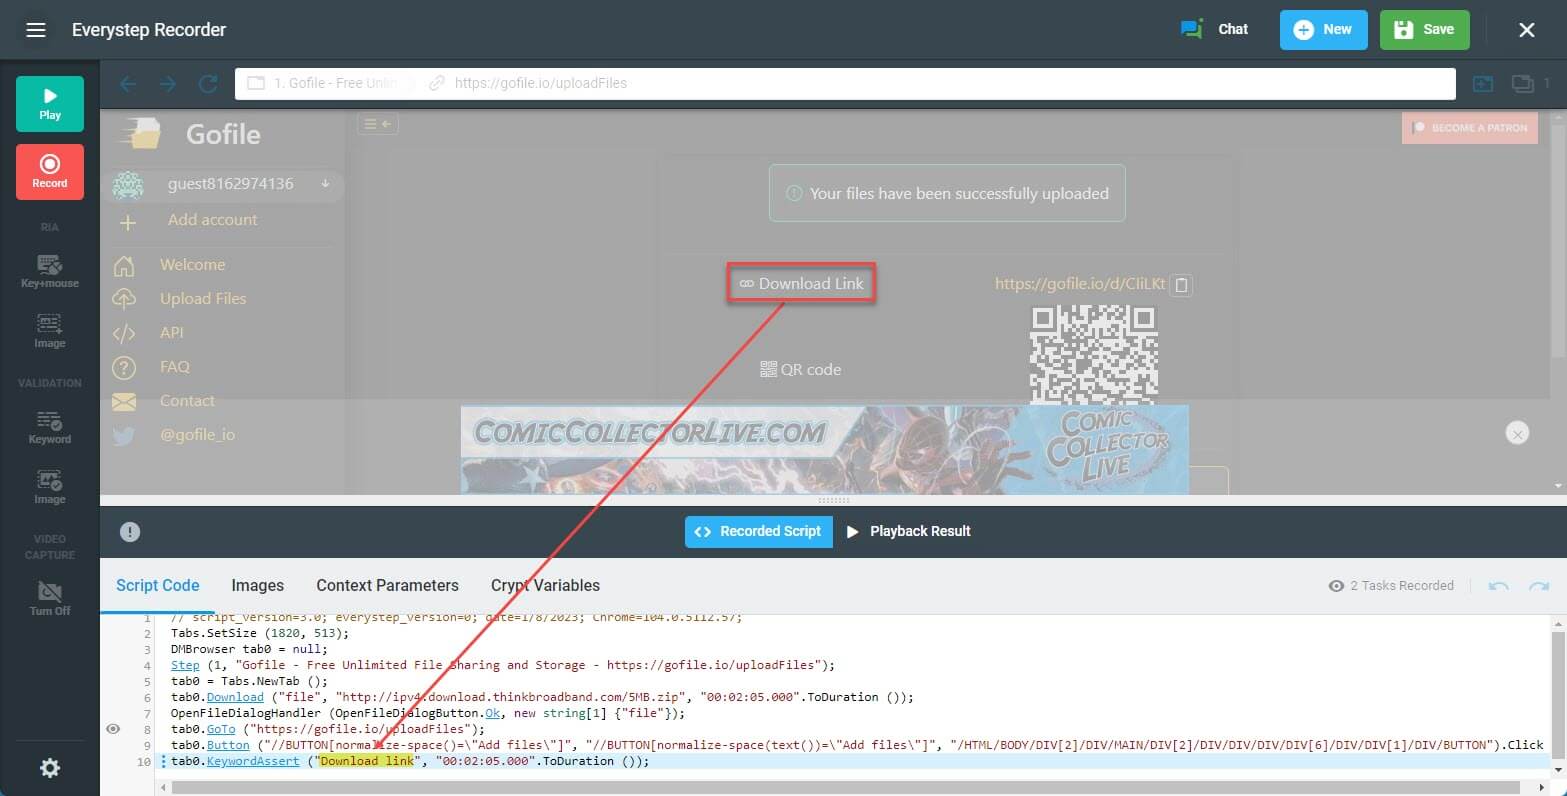
To validate the update result, we will use the Page Keyword Validation option from the script context menu (Validate > Page Keyword).