
If you have been using external data set in your parameterized JMeter test plan and want to bring your load testing to the next level with LoadView, you can import your JMeter test plan to LoadView and set up the test in a few clicks. LoadView uses the imported .jmx file with all request parameters and support variables and external data sets to simulate real-life load test scenarios. In this article, we will walk you through the setup of a parameterized LoadView JMeter Project.
If you are not familiar with the basics of LoadView JMeter Projects, please check our Load Testing Using JMeter Test Plans comprehensive guide.
What You Should Know Before Setting Up a Parameterized JMeter Load Test with LoadVew
Here are a few additional important points you should know before configuring your parameterized JMeter tests in LoadView.
The first, and the most important step is that you need to explicitly declare the variables used in your JMeter test plan in LoadView. Note that while working with parameterized JMeter test projects in LoadView, it is crucial to ensure that all variable names used in the JMeter script match the corresponding context parameter names declared in LoadView.
Another thing that must be taken into account while importing your parameterized JMeter tests to LoadView is that the CSV Data Set Config settings are not imported automatically with a .jmx files. However, LoadView fully supports this functionality. To use an external data set with variable values in a CSV format in LoadView, all you need to do is to upload the corresponding CSV file to the LoadView JMeter Project and specify how you want the system to parse the file in the LoadView interface.
As we have discussed earlier, you can also set the mode of allocating data from the external CSV file between virtual users ( similar to the Sharing Mode setting of the CSV Data Set Config element in JMeter). By default, LoadView selects the lines from the CSV file and uses them in requests in random order. However, you can configure the test scenario to use specific value row ranges and unique data in your test requests. To find more about load testing with unique test data, please read Load Testing with Unique Users: Configuring Usage of Value Rows in CSV File.
Setting Up Parameterized LoadView JMeter Project
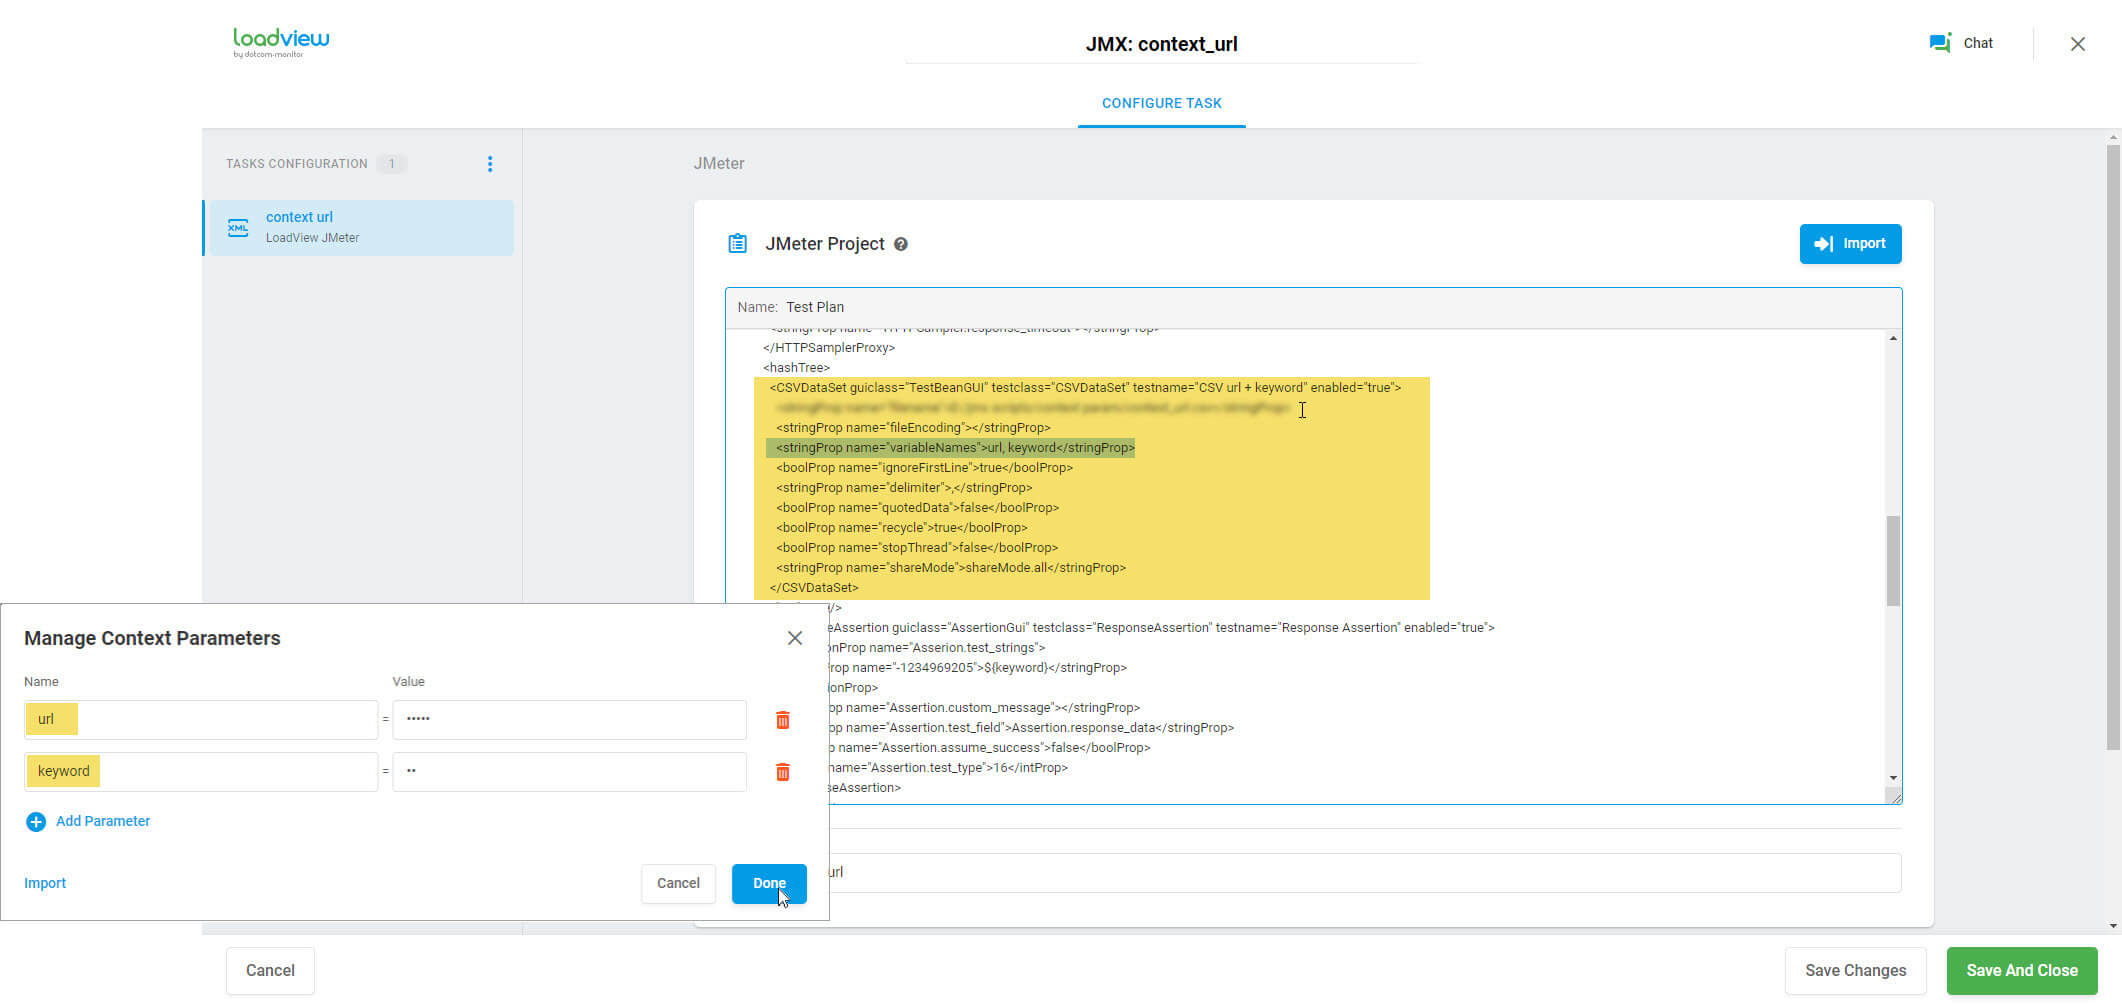
Once you have imported a JMX file with your parameterized JMeter script to LoadView, you need to declare the corresponding context parameters:
- Click the actions menu button
 on the Task Configuration sidebar and click Manage Context Parameters.
 - Add context parameters with the names that match the names specified in the Jmeter Project script.
- In the Value field, specify valid parameters’ values. The system will use the values to validate your JMeter test configuration. Please see the Validation of Load Test Device article on our wiki for more details.
- Click Done to save the parameters in the system.
To upload a CSV file with variable values, proceed to the Test Scenario screen:
- In the Context Parameter section, click Upload File and upload the CSV file. make sure the first line contains the variable names as they were declared in the load test settings. To create a file from scratch, see Uploading Dynamic Variables (Context Parameters) to the Test Scenario.
- Select the necessary mode of the file’s rows usage in the test request in the Row Use field and specify the Value Rows Range. To use one line with the variable values just once during a test run, select the Unique per Session row use mode. Please learn how LoadView processes CSV files with variable data and how to select the correct Row Use mode in the Load Testing with Unique Users: Configuring Usage of Value Rows in CSV File article of our Knowledge Base.
To configure other settings on the Test Scenario page, see the Load Testing Using JMeter Test Plans and How to Setup LoadView for Load and Stress Testing articles of our Knowledge Base.
If you need any further assistance with converting JMeter load tests into the LoadView platform, please contact our technical support team. Our team is available 24/7 to assist with all your load and performance testing needs.
Or if you already have a LoadView account, you can submit a ticket directly within the LoadView platform. To submit a support ticket, simply login to your account. From the top right-hand side, hover over Support, then select Tickets to submit a request.